Author: Philip Godfrey
In the previous blog, we introduced the Oracle Vision and creating a Custom Vision model.
The second blog in the series will work through creating and training a Custom Vision model using our previously labelled dataset.
What is Oracle Vision?
One of many AI Services introduced by Oracle, OCI Vision serves as an advanced AI tool aimed at facilitating extensive image analysis powered by deep learning algorithms.
It streamlines the process of integrating image and text recognition features into applications, eliminating the need for specialised knowledge in machine learning.
Accessing Oracle Vision
In OCI, navigate to Analytics & AI, and under the AI Services subheading, you will find Vision.
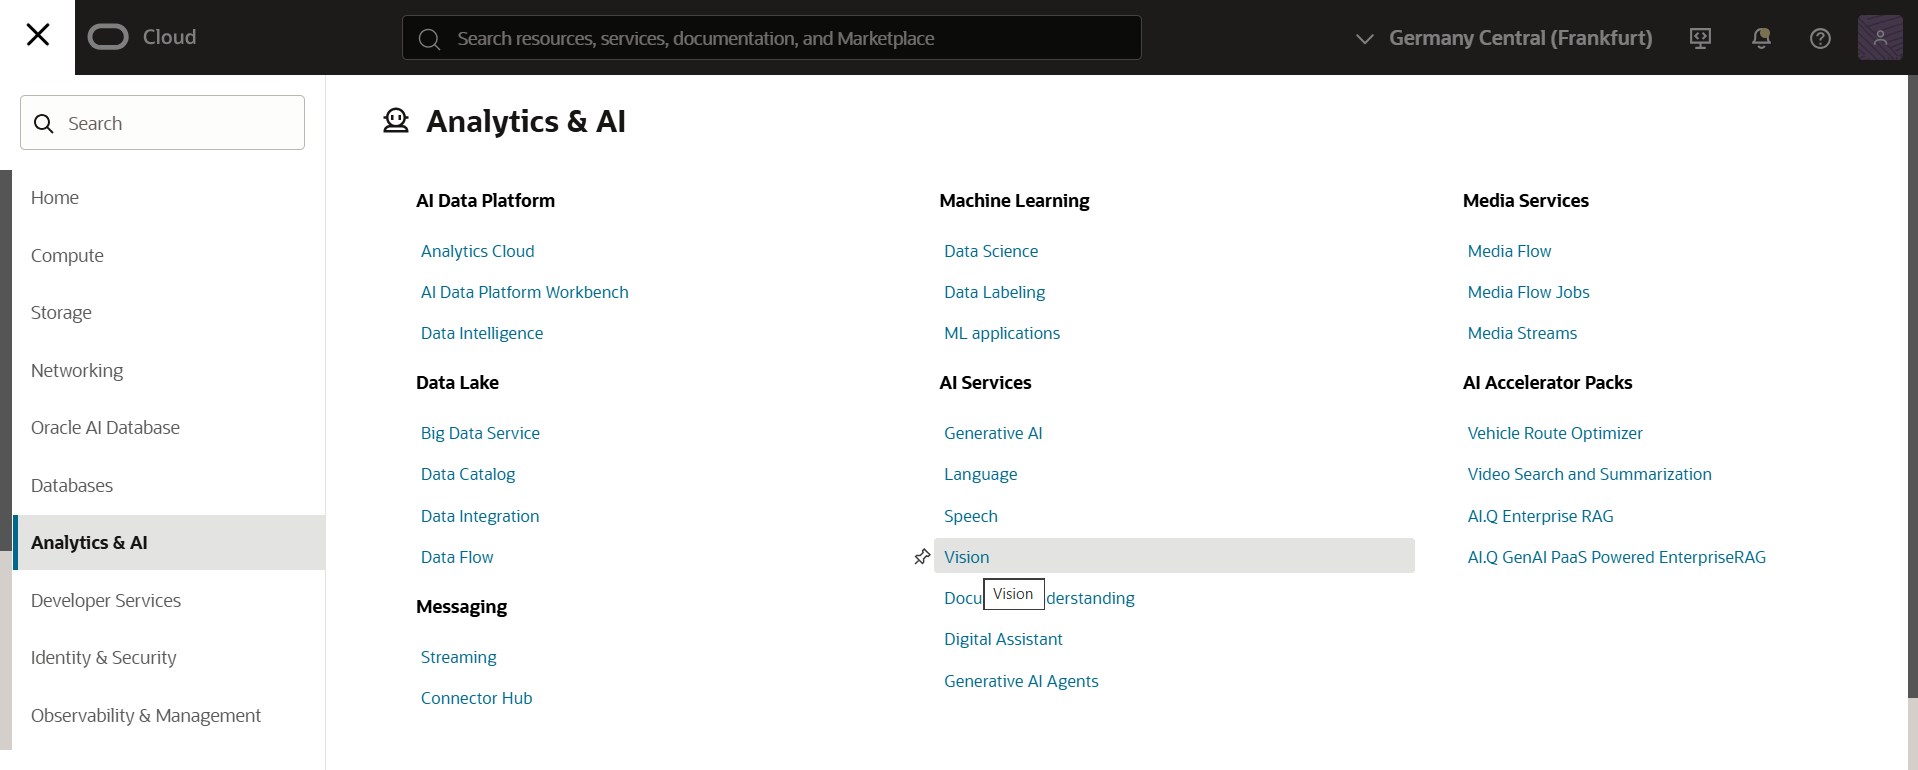
Once you click here, providing the necessary pre-requisites have been granted, you should see the overview of Oracle Vision.
The focus of this blog will be Custom models, so we need to navigate to Projects on the left-hand side of the menu:
Custom Models are available in the form of Image Classification and Object Detection.
In the previous blog we created a project, make sure to look back on that if you missed it. Blogs before that explained how we created our labelled dataset, that we will use to train a custom model on.
Note: Minimum Number of Labelled Images for each Label for a Custom Model is 10
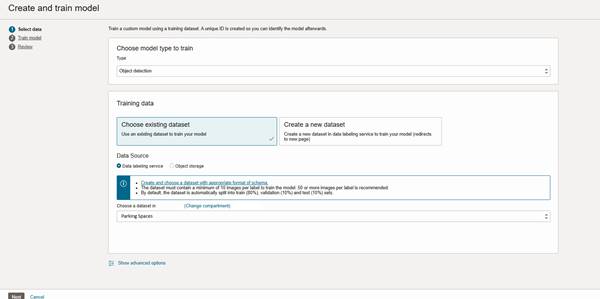
There are several steps to creating and training a model including:
- Type: Object Detection or Image Classification
- Training Data: Existing dataset or Create New Dataset (this will take you through to Data Labelling)
- Data Source: Data Labelling service (previously labelled data) or Object Storage
- Dataset: Select dataset from desired source
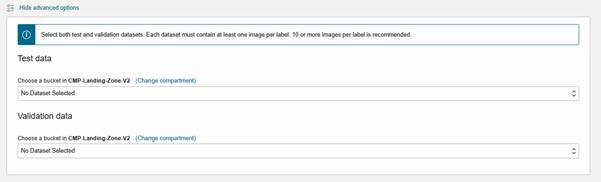
Optional Advanced Settings
- Test Dataset: select dataset from object storage bucket
- Validation Dataset: select dataset from object storage bucket
Train Model
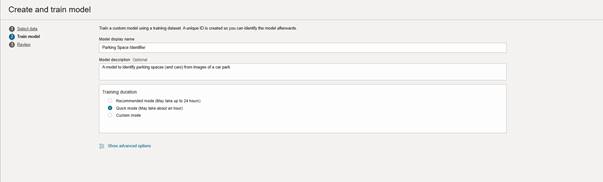
The next stage in the process of to train a model – for this there are some required fields you need to populate including:
Model Display Name: provide a unique display name for your model, which helps when collaborating with team members
Model Description (optional): optional to provide a description of the model, which helps provide extra context to the model
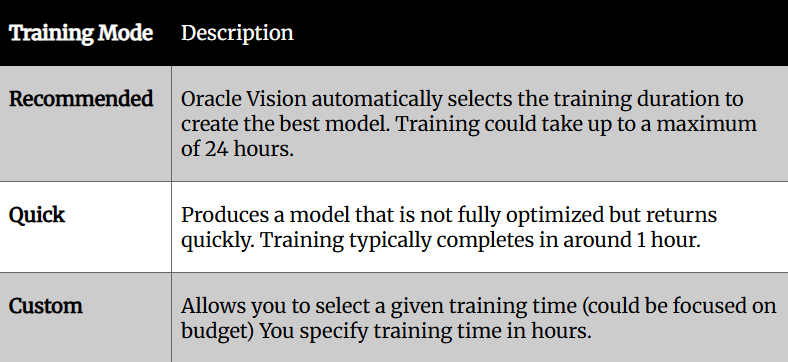
Training Duration: select from one of three options:
- Recommended Mode
- Quick Mode
- Custom
Which training duration should I choose?
The most appropriate training duration depends on the complexity of your problem, the typical number of objects in an image, the volume of data you are incorporating and budget, along with many other factors.
A summary of each training mode can be found below, to help you determine what is most appropriate
Train Model
As this is a first pass of the model, we have decided to go for Quick mode, with the view we can get an early indication of model performance on a model that is not fully optimized.
Create and Train
The final stage of the process is a review of all steps completed so far.
This provides a summary of the training data asset information, along with Model Information (model name/ type / training duration)
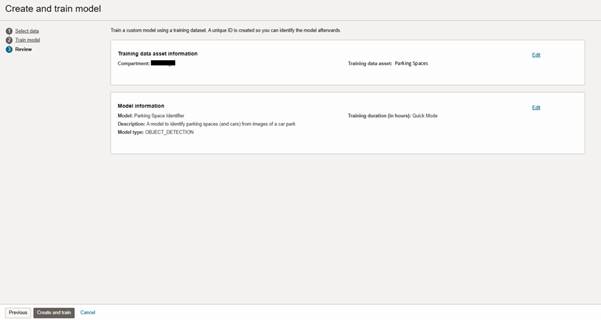
If you need to amend any of these attributes, you can select Edit to update these attributes.
However, if all is as expected, click Create and Train to kick-off the model training process.
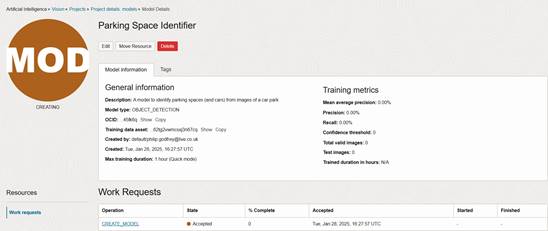
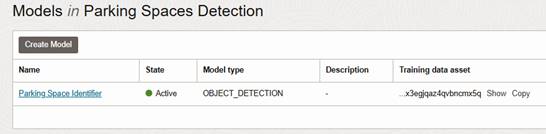
Once completed, you will see the model has been created and trained successfully.
Interested to know more?
We’d be more than happy to discuss your requirements or questions, please get in touch here.
Contact us today to arrange an assessment or email:

Philip Godfrey
Principal AI & Data Analytics Consultant